WebCam Imaging MasterClass
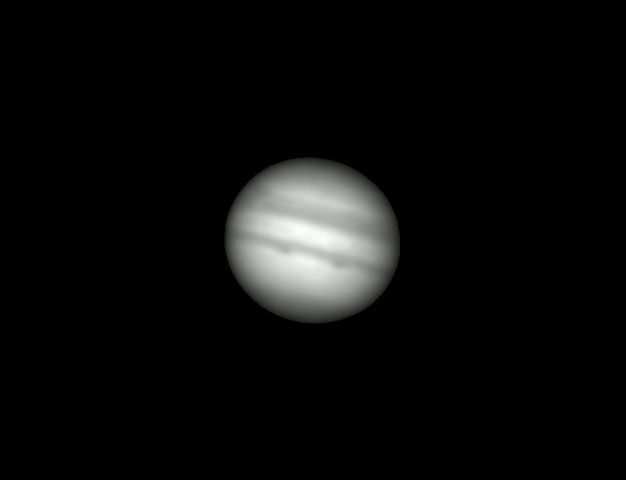
I’ve dabbled with webcam imaging before, but hitherto I’ve only achieved mediochre results – seeing perhaps a couple of cloud belts on Jupiter, some suggestion of a red spot, the faintest hint of additional structure with the contrast and sharpness filters turned way way up – that kind of thing.
Or more precisely this kind of thing…

Image Credit: Kevin Pretorius
Sure, it’s a better view of Jupiter than most of the public have ever seen, but it doesn’t quite match the visual impression I get upon looking through the same telescope, and certainly doesn’t exceed it, in the way that webcam imaging is supposed to do. And this is through a 12” scope too. So when John Moore, one of the club’s most experienced astro-imagers offered to give me some pointers, I was eager for the learning opportunity, and we agreed to meet up the next clear night.
But perhaps I should wind back a bit – why would anyone want to use a cheap old webcam, and expect to get anything better than cheap old results? Don’t good CCD cameras for astrophotography cost thousands of pounds?
Well yes they do, but most astronomical CCDs are purpose built and engineered to gather every last photon from really faint objects, whilst not corrupting the image with thermal noise. If you’re lucky enough to have such a camera, and especially one with a few megapixels and assisted cooling – then yes, buying it will likely have wiped the smile from your piggy bank.
Another factor is that astronomy CCDs are often designed to produce quite wide field images, which is the wrong direction to go when imaging something like Jupiter. Even at opposition, Jupiter seldom exceeds 50 seconds of arc in diameter.
But whilst Jupiter (like all planets) provides a smallish target, at least it’s bright. Really bright. A webcam has no problem pulling in Jovian photons by the lorryload. Thermal noise is not an issue, a cheap camera will do, and you can even use quite short exposure times and still get a good picture.
But the big advantage you get from a webcam is that it takes video. This is really useful, because at the magnifications necessary to get a decent image of Jupiter or Saturn, you’ll find that the atmosphere has turned into a quivering mass of jelly. Jupiter appears less like the majestic king of planets, and more like a breakdancing amoeba. Any long exposure photograph you might take would just be a horrible blur.
So it’s best to take lots of really short exposures, and then stack them together on your computer. Lots of short exposures is what video is of course, and that’s why webcams are so useful here.
But back to the present. After setting up the telescope for tracking, the first thing John did upon arrival was to perform a star test – a careful check of the telescope’s optics. The scope had already been outside for several hours, to ensure tube currents were minimal. We picked a second magnitude star, used a high power eyepiece (5mm), and wound the image backwards and forwards through focus, looking at the shape and quality of the diffraction rings. The star test revealed a small collimation error, which was quickly resolved by adjusting the secondary mirror and retesting until it was right. John recommends checking collimation prior to every imaging session.
Swinging over to Jupiter and viewing with a low-power eyepiece, the planet was roughly centred in the field, and the eyepiece swapped for the webcam. Jupiter wasn’t initially in view through the webcam, so it was necessary to hunt around a small amount to re-acquire the planet, re-focus, and move this to centre field. Here my fork mounted alt/azim drive struggled a little (it seems to have a problem) but eventually the image was centralised and stayed put. More or less.
I use wxAstrocapture (freeware) to control my webcam. John had plenty to advise about the settings – Gamma down to zero, keep the exposure short enough to avoid blurring due to those dance moves (maybe 1/100th second), but long enough to ensure we are still capturing enough light to fully utilise the 8 bit luminance range of the camera. Use the histogram feature to ensure that the image peak whiteness is up at about 230-240, and use the gain setting as necessary to finesse this. Take about 10-15 images per second, but record for no more than 90 seconds, as Jupiter’s rapid rotation will thereafter begin to smear the final result.
So we focussed as best we could (a challenging thing to do with a dancing amoeba, which leaps and jumps each time you touch the focussing knob) and then recorded about 1200 frames. We then refocused and recorded again, and once again, hoping to get at least one with an amazingly sharp focus. Afterwards we repeated the process with a Barlow lens inserted, to get a very close up image, but one which proved much harder to keep centralised, and much harder to focus accurately.
With some footage “in the can” we retired to the warm, to let Registax work its magic. Registax is an incredibly sophisticated, powerful (and free) piece of image processing software, but about as user-friendly as angry porcupine (a phrase you will hear Fraser Cain use on the soon-to-be-aired Astronomy Cast episode #142 – because I fed him this live on air via IM. Really). But I digress.
With Registax, you load the video frames, allow it to pick the best ones, stack them on top of each other (to create a composite image) and then use various image processing tools to bring out fine detail lying buried in the image.
What I learned was:
- Use lots of align-points in your alignment set-up. 10 is good 15 is better. Align-points are used by Regsitax to break up your image up into lots of triangles which Registax can then move and stretch independently to try to undo that atmospheric jellification.
- Throw caution and fear to the wind, and experiment with wavelets. These signal processing marvels dive in and drag out the detail in your pictures. If you go too far, just add back a little smoothing to tone down any image artefacts
- Always rotate your image until the belts are horizontal. I confess I quite liked having Jupiter tilted over at a jaunty angle, but John shuddered at the proposal. So here it is, John, as learning point number 3.
- Always save your image as a 16 bit TIFF. You want to keep every one of those hard earned bits – don’t throw half of them away by saving to an 8 bit .bmp file or lose detail and add ringing artefacts in a .jpg. You’ll thank me.
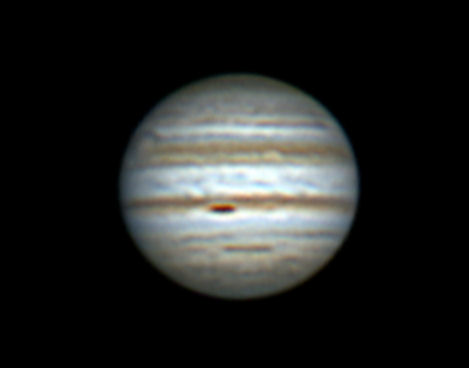
And that’s about it. What did the end result look like? Well here it is…

A huge improvement on my previous attempts I think you’ll agree, and one which gains ooohhs and aaahhs any time I show it. I almost feel if I now know what I’m doing.
By Kevin Pretorius
Dec 2011
The Society was saddened to hear in August 2015 that John Moore had died. Click here for a tribute to John
